
To Create a web rule:
- Select Live Chat Dashboard
- Click on Web Rule
- Click Create New button on the top right
- Add the conditions, select the display options and select the actions
- Save the changes
Chat Widget:

You can enable or disable the live chat using the button “Enable Live Chat”
EngageBay lets you customize the live chat's display settings, including the chat display profile photo, widget color, and chat button position.
Just go to the Live Chat > Chat Widget. Make the necessary changes and click on Save Changes.
Chat Form:

You can get your visitors to enter information, like their name, contact number, and others, by enabling the pre-chat form.
To enable the pre-chat form:
- Go to Live Dashboard > Chat Forms.
- Select what details you would like to capture from your website visitors or customers at the beginning of your conversation. It includes name, email, message, and button text. You can even add any custom field if you like by selecting options from Add Custom Fields.
- Once the selection is done, click the toggle button at the top of the screen to activate the pre-chat form.
- Select Update Changes.
Shortcuts:

Shortcuts are like canned responses for service tickets. You can create shortcuts for common replies to save your agents time.
To create and use shortcuts:
- Go to the Live Chat dashboard.
- Click on Shortcuts.
- On the top right corner, select Create New.
- Type in the name of the Shortcut and a message for the same.
- Click Submit.
All your shortcuts will be listed on your screen. Next time, you are chatting with a user, simply enter (/{shortcut name}) and press Send. The message will automatically get converted.
Settings:

To make sure that you immediately respond to your visitor's queries, EngageBay sends out instant notifications every time a new chat is received. It enables both emails as well as desktop sound notifications.
To enable notification:
- Log in to your EngageBay account.
- Go to Live Chat > Settings.
- On the left panel, you will find three options – Sound Notifications, Desktop Notifications, and Email Notifications.
From the Sound Notifications, you can choose the sound of your notification alert.
From the Desktop Notifications, check the box New Chat and set the notification time.
From the Email Notifications, check the box When New Chat Comes.
After you Update all the changes, you will start receiving notifications.
Email Defaults:
Here you can configure the sender name and sender email id to send the chat transcripts. If you want to automatically send the chat transcript to the visitor then please select the option “Send chat transcript to the visitor” and click on the update button to save the changes.
Business Hours:
EngageBay lets you define your business hours to ensure that your live chat widget is visible only during working hours.
To define your business hours:
- Go to the Live Chat dashboard.
- Click on Settings, and select Business Hours from the left panel.
- Set the Time Zone and Business Hours. Check the boxes for working days of the week and enter the business hours.
- Once done, click Update.
Your business hours will be updated now.
Disabling Live Chat during non business hours:
When you're signed into EngageBay Chat, you can configure a setting related to your availability to assist customers
If no assistance is available during non-business hours, you can easily disable the chat option.
To disable chat option:
- Go to the Live Chat dashboard.
- Click on Settings, and select Business Hours from the left panel.
- Set the Time Zone and Business Hours. Check the boxes for working days of the week and enter the business hours.
- Once done, check the box right before Disable Chat During Non-Business Hours.
- Click Update.
The live chat will be disabled for all your users in the live chat account.
System Messages:
EngageBay lets you configure system messages. You can edit/modify the message
“When the chat is closed”, and you can enable the option to “Show offline message” and modify the offline message.
File Repository
In the EngageBay Files Repository, you can easily upload and store your files and share them with your EngageBay account users. You can send these files via email, add them to email templates, or use them on your landing pages.
Uploading a file in the File Repository:
- Go to the Live Chat dashboard.
- Click on the three dots (...) right next to Settings, and select Files Repository.
- Click Add Files in the upper right corner. A new panel will pop up.
- Enter all the necessary details such as titles, descriptions, etc., and upload your files.
- Hit the Submit button to complete the upload. Once submitted, they will show up on the File Repository list.
Trash
It is a place where you will find all the deleted contacts, companies, deals, tasks, forms, pop ups, broadcasts, and email templates. You can also restore them if they were deleted by mistake. Please note that Trash will hold all the deleted records for 30 days after which all the records will be deleted permanently and cannot be recovered.
To access Trash:
- Go to the Live Chat dashboard.
- Click on the three dots (...) right next to Settings, and select Trash
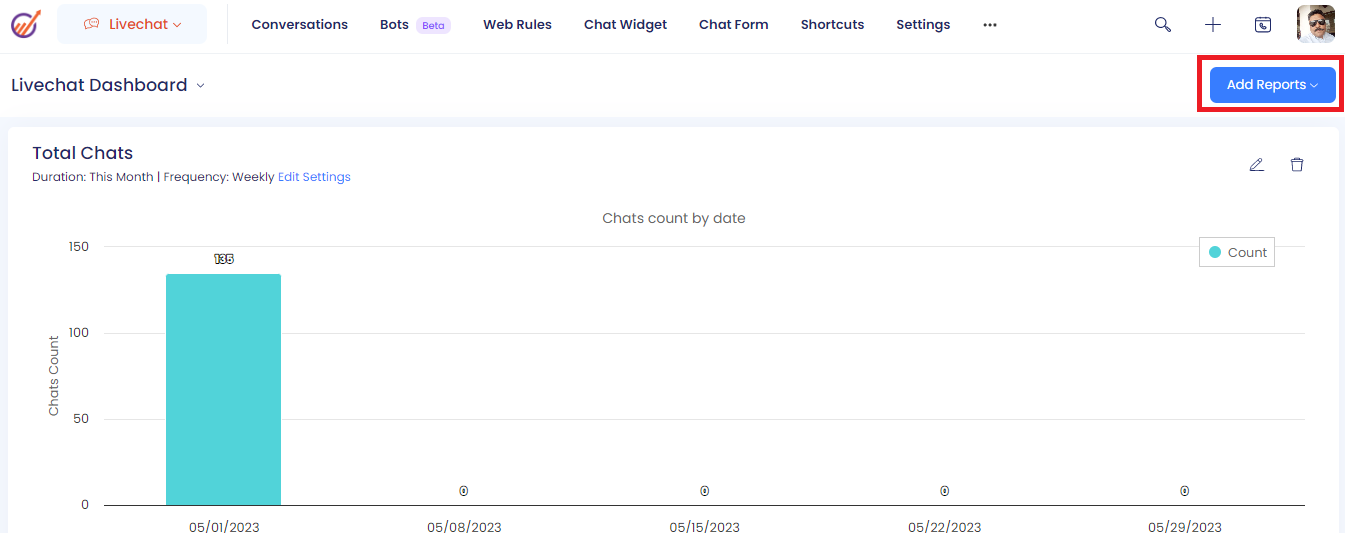
Conclusion:
Improve live chat support operations, assess customer satisfaction, and track trends over time with EngageBay's advanced live chat dashboard.


